As an author or publisher, you want your readers to have an easy time purchasing your ebook. Amazon and Apple Books are two popular online platforms for purchasing ebooks. However, customers from different locations may have preferences for one store over the other. Instead of listing links to every existing Amazon or Apple store, a redirect service can automatically direct your customers to the nearest store based on their geographical location. In this article, we’ll discuss how to create a redirect service that automatically redirects your customers to the nearest Amazon and Apple Books stores using Microsoft Azure Function and Geolocation API.

Step 1: Get the Geolocation API token.
To redirect the customer to the nearest online store, we need to map the customer’s IP to their geographical location. This can be done by using geolocation APIs such as FindIP.net. At the time of this writing, FindIP.net API is unlimited and free to everyone (just need to sign up). Just keep in mind there are many more APIs, but some are not free and some have limits on how many requests you can make per day or month. Also, if you choose to use a different API, you will need to adjust the code in step 2.
- Navigate to findip.net and click on the Sign Up button.
- Fill out the form and click Sign Up at the bottom of the page.
- Password must be exactly 8 characters long.
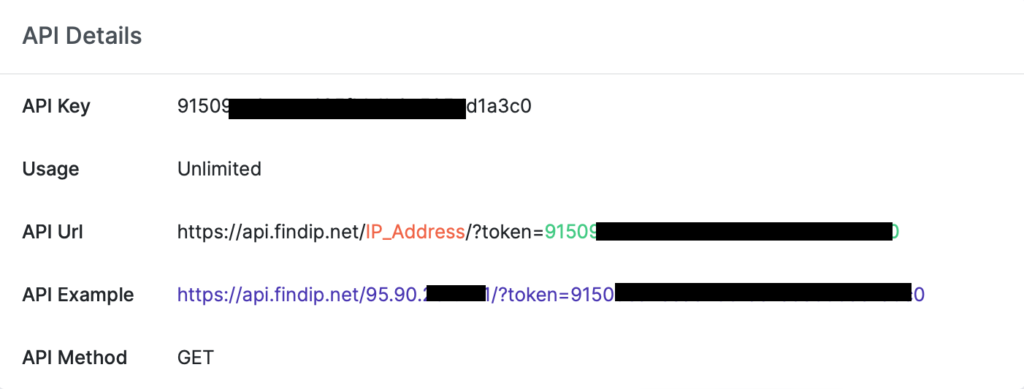
- Once you logged in, you should see the API Details section. It should look similar to the image below.
- Take note of the API key.
Step 2: Create an Azure function to execute redirect.
Next, we will create an Azure Function to process customer requests when they click on a “Buy” button and redirect them to the corresponding online store.
- If you don’t yet have an Azure account, you can create one for free here.
- Open the Azure Portal and create a new Azure Function.
- Click on the “burger” icon in the top left corner to bring up the menu.
- Select the “Create a resource” option.
- In the “Search services and marketplace” box type: azure function
- On the results page click on the “Function App” tile.
- Then click the “Create” button.
- Select a subscription that was created when you signed up for your account.
- Create a new “Resource Group” by clicking on the “Create new” link.
- Enter the Name (e.g. ecommerce) and click Ok.
- Provide “Function App name” (e.g storeredirect)
- Set “Runtime stack” to Node.js
- Select your Region (e.g East US)
- You can leave all other settings as default. The screen should look similar to the image below.
- Click the “Review + create” button.
- Azure will validate the configuration for a few seconds.
- Next, click on the “Create” button.
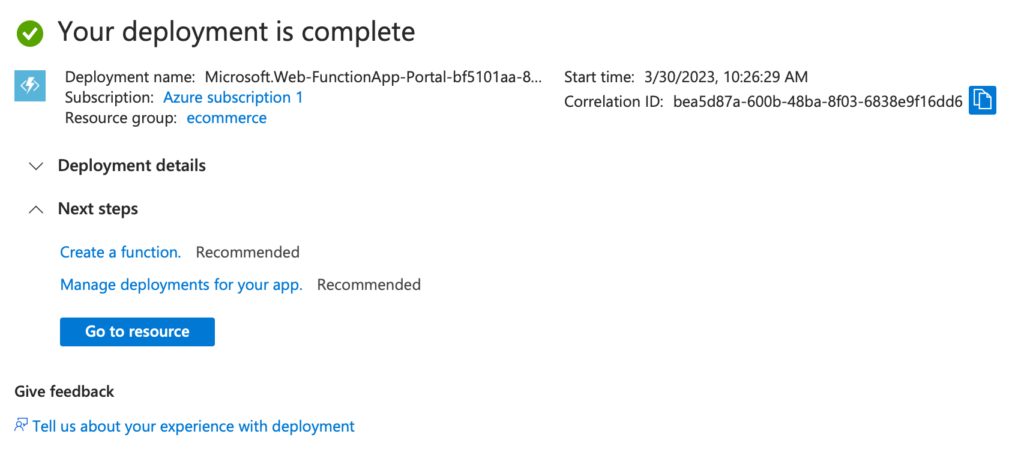
- Wait while Azure completes the Deployment.
- Once completed, you can navigate to the resource by clicking the “Go to resource” button.
- On the resource page, in the left menu, click on the “Functions” item under the Functions category.
- On the Functions page, click on the “Create” button to add a new function.
- On Create Function screen, select “Develop in portal” as a Development environment.
- Select “HTTP trigger” from the list of templates.
- Provide a New Function name, e.g. RedirectBasedOnIP
- And select the Authorization level
- For simplicity, select Anonymous, though keep in mind that in this case, the function will be accessible to anyone who has the link. If you want to limit access to this function, you should set a more secure level, but you might also need to adjust the code provided below.

- Click Create.
- Once the function is created, you should see the RedirectBasedOnIP (or whatever you named it) page.
- In the menu on the left, click on the “Code + Test” option under the Developer category.
- Make sure index.js is selected and copy-paste the code from the GitHub repo into the editor window.
- Replace the token value (on line 29) with the API key you got in Step 1.
- The code editor should look similar to the image below.
- In the command menu at the top of the code editor, click on the “Save” link.
- Next, in the same menu, click on the “Get function URL” link.
- On the “Get function URL” pop-up click on the “copy to buffer” button to copy the URL to the clipboard.
- Paste and save the URL in Notepad or some other text editor. You will need it in the next step.


Step 3: Prepare links
Next, we need to prepare links to the stores where our book is listed for sale.
I’m going to use the following links for an ebook I have listed both on Amazon Kindle and Apple Books.
Amazon Kindle: https://kdp.amazon.com/amazon-dp-action/US/dualbookshelf.marketplacelink/B0BY7D8G1Q
Apple Books: https://books.apple.com/US/book/newton-in-imagination-city/id6446348158
Notice that both links include the US parameter, but depending on your location it can be different (e.g. DE, CA, FR, UK, etc). This is the country code we are going to replace based on the customer’s IP address. If the link to your store doesn’t include the country code parameter, this solution will not work. Let’s modify the URL so the country code is replaced by a placeholder {_}:
Amazon Kindle: https://kdp.amazon.com/amazon-dp-action/{_}/dualbookshelf.marketplacelink/B0BY7D8G1Q
Apple Books: https://books.apple.com/{_}/book/newton-in-imagination-city/id6446348158
Note the placeholder {_} in the updated links. Now let’s encode the above URLs so we can use them when calling the redirect service.
- Navigate to urlencoder.org and paste the above links into the Encode box one by one
- Click Encode
- You should get results similar to these:
- https%3A%2F%2Fkdp.amazon.com%2Famazon-dp-action%2F%7B_%7D%2Fdualbookshelf.marketplacelink%2FB0BY7D8G1Q
- https%3A%2F%2Fbooks.apple.com%2F%7B_%7D%2Fbook%2Fnewton-in-imagination-city%2Fid6446348158
- As you can see all spaces and special characters were encoded. This step is required to prevent the redirect service from incorrectly processing the link.
- Copy and save the encoded links in Notepad or some other text editor.
Now we need to pass the encoded link to the redirect function we created in Step 2.
Recall the link from Step 2 (function URL). It should look similar to this: https://yourfunctionsname.azurewebsites.net/api/function
Let’s include the encoded store link in the function URL by appending: ?template={encodedLinkToStore} at the end of the URL:
https://yourfunctionsname.azurewebsites.net/api/function?template=https%3A%2F%2Fkdp.amazon.com%2Famazon-dp-action%2F%7B_%7D%2Fdualbookshelf.marketplacelink%2FB0BY7D8G1Q
https://yourfunctionsname.azurewebsites.net/api/function?template=https%3A%2F%2Fbooks.apple.com%2F%7B_%7D%2Fbook%2Fnewton-in-imagination-city%2Fid6446348158
Copy and save updated function URLs in Notepad or some other text editor. You will need it in the next step.
Step 4: Configure the social media landing page
Social media links and landing pages have become increasingly popular for linking customers to relevant online resources. Next, we are going to create a link page and add Buy buttons to direct customers to the store where they can buy our ebook.
- Navigate to Buffer.com and create a new account.
- On the welcome screen, select the “Build your Start Page” option.
- Select a template most suitable to you.
- Provide a name for your page.
- Next, you can modify the template by adding or removing various blocks (button links, image links, text, YouTube Video, etc).
- Delete (or update) the blocks you don’t want to see on your page.
- Now let’s add two “Buy” buttons to the page.
- Click on the “Add Block” button in the right-side menu.
- Select “Button Link” under the Essentials category.
- Provide a button Label, e.g. “Buy from Amazon“
- Enter the corresponding Link from Step 3, e.g. https://yourfunctionsname.azurewebsites.net/api/function?template=https%3A%2F%2Fkdp.amazon.com%2Famazon-dp-action%2F%7B_%7D%2Fdualbookshelf.marketplacelink%2FB0BY7D8G1Q
- Repeat the steps to add 2nd button for the Apple Books store.
- You should have a landing page similar to the image below:

- Once you are happy with the look of your landing page, click on Publish Changes button.
- Enter Your Business Name (e.g. picture-books) and click “Publish Start Page“
- Congratulations! Your Start Page is live!
- Next, you can “Copy Link” and use it on your social media profile.
- https://picture-books.start.page
When potential customers click on your Start Page link, they will see your page and can easily navigate to the nearest online store where they can purchase your ebook.
If you encounter any issues or have a more complex scenario, feel free to reach out. I’d be happy to help!